In my recipe for Alsace onion tart, I recommended a very simple way of dealing with the pastry: after rubbing in the butter and forming the dough, you simply spread the dough in the tart tin by hand. Elizabeth David says that she finds this "the easiest and most generally successful tart pastry": that is good enough for me. It was light and crisp when I made it last Friday.
Elizabeth David's cheese tart has a kind of souffle as a filling. Her recipe is suspect: she suggests a thick bechamel made with 1 oz butter, 2 tbsp flour, and 1/4 pint milk. That is more flour than the butter will absorb; and it will make a quadruple thick, rather than double thick, sauce. She must mean 2 oz, surely.
For the pastry
140 g flour
70 g butter
About 2 tbsp water
1/4 tsp salt
For the filling
28 g butter
28 g (about 1 tbsp) flour
140 ml milk
60 g Gruyere, grated
2 eggs, separated
Pepper, dash of nutmeg, dash of cayenne or chilli pepper
1 tbsp Parmesan, grated
Cut the butter into small cubes, and put them into the fridge for 30 minutes to chill. Then rub them into the flour; they do not have to be absorbed completely. Add salt, and just enough water to form a malleable dough. With your hands, spread the dough into a buttered tart tin (mine is 22 cms in diameter). Prick the dough with a fork. Line the tin with foil or kitchen paper, weighed down -- to stop the pastry bubbling up -- with baking beans. (I use a cake tin.) Bake in a gas mark 5/190 C oven for 15 minutes, remove the foil or paper, and bake for about five minutes longer, until the pastry is no longer tacky.
Meanwhile, melt the 28 g butter in a small saucepan, stir in the flour, and allow the mixture to cook gently for a minute, until you have a sandy roux. Turn up the heat a little, and stir in the milk a few splashes at a time, incorporating each addition before making another. You should end up with a pasty sauce. Stir in the Gruyere, then the egg yolks, and add the seasoning. You may not need salt.
Whisk the egg whites until they form stiff peaks. Fold them into the thick bechamel. I do this with a lifting and turning motion, until the egg and the sauce are blended.
Spread the sauce into the pastry case. It does not appear to be a particularly generous filling; but it will expand. Sprinkle the Parmesan on top.
Elizabeth David suggests that you bake the tart at gas mark 6/200 C for about 15 minutes. I baked mine at gas mark 3/160 C for about 30 minutes. I wonder if the higher temperature would have caused the filling to become lighter and puffier.
I shall take a break tomorrow. Work -- of the kind I get paid for -- is banking up.
Tuesday, February 27, 2007
Monday, February 26, 2007
Roast chicken breasts
When I roast a chicken, I am usually preparing several meals. There is the roast for that day; a preparation such as hash or curry with the leftover meat; and a soup or risotto with the stock that I'll make from the carcass. Another approach, more logical perhaps, is to cut up the chicken first, and use the pieces as you need them.
At the weekend, I got my butcher to cut a chicken into 10 pieces. I kept the backbone, using it with the neck to make a stock. I roasted the breasts; the next day, I made what Marcella Hazan calls a fricasse (there are other meanings of the term -- I'll describe this recipe later in the week) with the thighs, drumsticks and wings.
The breasts made a very simple meal. I wiped clean four flat mushrooms, cut them into fork-sized pieces, and tossed them with a tbsp of olive oil, a clove of chopped garlic, salt and pepper. I placed them in a roasting tin. I coated the chicken breasts with a little more oil, and placed them on top of the mushrooms. I squeezed over the juice of a lemon, and threw the hulls into the tin. I ground over a little more salt.
Chicken breast dries out and toughens very easily. A high temperature forces moisture from the meat; on the other hand, a low temperature will mean that the meat is thoroughly dry before it has cooked through. Rapid cooking is preferable. I roasted these breasts for 30 minutes at gas mark 6/200 C. That was probably five minutes longer than they needed.
We ate the chicken and mushrooms with mashed potato.
Friday, February 23, 2007
Cauliflower cheese
I implied, in my entry on Sicilian cauliflower, that cauliflower cheese was humdrum. But sometimes humdrum is what you want. And sometimes you look in the recipe books for more original ideas and find that you don't have the necessary ingredients.
Anyway, cauliflower cheese went well with the braised fennel: the creamy richness offset the flavours of aniseed, tomato and vinegar.
I usually bake cauliflower cheese. Putting it under the grill may be preferable, because the cauliflower and the sauce do not really need extra cooking: but it means preparing the ingredients at the last minute, so that they are already hot when they go under the flame. (The grill would scorch the topping before it warmed up the rest of the dish.) This is a dish that you can prepare in advance, putting it in the oven 20 minutes before serving.
For a small cauliflower, I prepare half a pint of bechamel: 28 g butter; 28 g plain flour; 280 ml milk. Melt the butter, stir in the flour, cook the roux very gently for a minute, turn up the heat to the low side of medium, and stir in the milk gradually, incorporating each addition before adding the next. The sauce should be of a spoon-coating consistency. Allow it to bubble for a minute, continuing to stir. Stir in 100 g grated cheese. I used a supermarket-bought Cheddar; Gruyere, Cantal or any such melting cheese would also be good. Add a pinch of nutmeg and half a teaspoon of mustard if you like; black pepper is essential, I think. You may not need salt.
Break up the cauliflower into florets, and steam or boil them for five minutes. I don't like leaving the cauliflower whole, because it requires longer cooking; parts of it will overcook, acquiring the rank qualities that all brassicas develop in these circumstances. The florets should give to a sharp knife, but retain some crunch.
Mix the cauliflower and sauce, and tip into an oven dish. Cover the surface with breadcrumbs, or a mix of breadcrumbs and parmesan. Bake at gas mark 6/200 C for 20 minutes, or until the surface is browned and the sauce is bubbling.
Thursday, February 22, 2007
Braised fennel and tomatoes
 Two heads of fennel arrived in the vegetable box yesterday. The recipe below is what I did with them, using up a carton of plum tomatoes (which were grown in Italy and bought in a supermarket -- but I am unable to dissuade my loved ones from buying them).
I used about 3 tbsp of vinegar, and boiled it down. But my wife found the dish too sharp. If there had been any black olives in the house, they would have gone into the mixture too.
I steamed the fennel before adding it to the other ingredients because the acidic environment would have inhibited softening.
There is an entry on grilled fennel here.
2 heads fennel
1 clove garlic, chopped
1 onion, sliced
2 tbsp olive oil
1 tbsp red wine vinegar
2 handfuls plum tomatoes, chopped
1 handful flat-leaf parsley, chopped
Salt and pepper
Wash the fennel, throw away any discoloured bits, chop off the stalks, but retain the leaves. Cut the bulbs into vertical slices about 0.5 cm thick. It does not matter if the slices break up a little. Steam or boil for five minutes.
Soften the onion and garlic in the oil, adding more oil if the vegetables catch. When they are turning golden (after about 10 to 15 minutes), pour in the vinegar, let it bubble and reduce for a couple of minutes, and throw in the tomatoes. Tip in the fennel and fennel leaves as well, stir, add a little salt, and cover the pan. Simmer, stirring from time to time, for about 20 minutes, or until the fennel is soft and the tomatoes have broken down. If there is a lot of liquid, uncover the pan to let it evaporate, turning up the heat if necessary. You want the fennel to be coated in a tomatoey, oniony sludge.
Check the saltiness. Stir in the parsley, grind over pepper, and serve.
Two of us ate all of this, with cauliflower cheese.
Wednesday, February 21, 2007
Apple crumble
This is a very basic crumble -- and it doesn't need improving.
For the crumble: 100 g plain flour; 60 g butter; 1 tbsp caster sugar. I like a buttery crumble. As when making pastry, I cut the butter into little cubes and put them back into the fridge to chill for half an hour. Then I rub them into the flour. It doesn't matter if some blobs of butter remain.
You can also use a food processor. But I quite enjoy rubbing butter into flour; and I don't enjoy getting the processor out of the cupboard, assembling it, disassembling it, and washing it.
Stir in the sugar.
For the apple: 3 Bramley apples. Bramleys are best, I think. I have used any kind of eating apple that has been in the house. But they disgorge their moisture, and become dry, in my experience; whereas Bramleys retain a moist texture. Also, no other apple has that mouth-tickling tartness.
Peel them, halve them, quarter them, core them, cut them into segments, and throw them into acidulated water to stop them discolouring. (I use the juice of half a lemon or, if I don't have that, some vinegar.) Transfer them to a pan, with some of the water still clinging to them, cover, and put on a medium heat. After a couple of minutes, sprinkle over a tbsp of caster sugar (which might have caught on the dry pan). Stir in a clove or two and a dash of cinnamon if you like.
Cook the apples until they start to soften, stopping while they retain their shape. Taste for sweetness. You should not need more liquid. If you do, stir in a little orange juice. If there is too much liquid, pour it off into another pan, boil it to reduce it to a syrup, and recombine it with the apple.
Tip the apples into an oven dish. Sprinkle on the crumble, dot it with a few shavings of butter, and bake at gas mark 6/200 C for about 30 minutes, or until the top is brown.
Tuesday, February 20, 2007
Roast peppers
 I am not sure that advice to put roast or grilled peppers into a bowl and cover them with clingfilm is much help. In my experience, the loose skin is loose already; the skin that remains closely attached to the flesh of the pepper will not lift away as a result of a little steam.
I roast peppers more often than I grill them, unless I want the rawer flavour of grilled peppers in a salad. I put them into the oven at the highest setting for 20 to 25 minutes, until parts of the skin are charred. If you cook them for too long, the flesh starts to shrivel.
They are plenty of ways to eat them. On their own, with their juices, olive oil, salt and pepper. With goat's cheese or feta. Stirred into couscous, bulgur or rice. Stirred into tomato sauce. I like to roast the peppers I use in a ratatouille.
Monday, February 19, 2007
Toad in the hole
I made a particularly good toad in the hole last night. There were various factors behind the success, I think.
The batter. It was light, composed half of milk, half of water. Most recipes tell you to add liquid to the flour, stirring to incorporate it before adding more; but this involves working away at the flour, developing the gluten and creating a tougher batter. It is easier to add the flour, tbsp by tbsp, to the liquid, blending with a whisk. The odd lump will do no harm.
The oil. Groundnut is good. Sunflower asserts its flavour, giving you the sense that you're eating something greasy.
The receptacle. Use a roasting tin. The batter will not crisp in a ceramic oven dish. The quantity below formed a thin, crispy batter in a 24 x 33 cm tin.
The sausages. You want good ones, obviously. Some recipes tell you to brown them first; they even use the term "seal". Frying does not seal meat, as experiments have shown; the suggestion that it seals sausages is ridiculous. They will brown in the oven. I lay them on top of the batter, rather than risk splitting them by placing them in the hot oil.
For 4
140 ml milk
140 ml water
1 egg
112 g flour (plain or self-raising)
Salt
Groundnut oil
8 sausages
Beat the egg in a large bowl. Pour in the milk and water, and add a little salt. Gradually whisk in the flour, until you have a batter with the consistency of single cream. The experts advise you to leave the batter to rest for half an hour.
Heat the oven to gas mark 6/200 C. Pour just enough groundnut oil into a roasting tin to coat the bottom, and put the tin into the hot oven for 10 minutes. You want it to be hot, so that the batter will start crisping.
Check the consistency of the batter, adding a little more milk or water if it seems thick. Take the tin out of the oven and pour in the batter, tilting the tin to spread it over the surface. Lay the sausages on top.
Bake for 30 to 35 minutes, or until set and crisp.
Friday, February 16, 2007
Celeriac gratin
I have a friend who uses no other recipe books than those of Elizabeth David and Jane Grigson. They offer more than enough to keep one occupied. Their books were written from the points of view of domestic cooks, and have a simplicity lacking in today's glossy cookbooks, mostly inspired by ideas from professional kitchens.
 You have to be wary only of Elizabeth David's measurements, and of Jane Grigson's use of butter. In this celeriac gratin, Grigson dots butter in between the layers, and on top. I have left it out.
This will provide a light supper for two, with perhaps some rice or a salad.
Peel a medium celeriac. This is a crude job, because the vegetable is so knobbly; I cut it in half, then cut off the skin with a knife, accepting that some of the flesh will get lost too. Cut it into slices about 0.75 cm thick; you can drop them into acidulated water to prevent discolouration. Steam until soft.
Make a tomato sauce: soften a chopped clove of garlic in a tbsp of olive oil, tip in a can of tomatoes, add a little salt, and simmer until thick. You can break up the tomatoes with a wooden spoon as they cook. I sometimes add a little vinegar and sugar, and maybe a bayleaf.
The sequence in which you layer ingredients in a gratin is not terribly important. This is what Grigson recommends here. Butter a gratin dish, and layer the celeriac with grated parmesan, grinding over pepper if you like. Finish with a layer of celeriac. Pour the tomato sauce over the top. Over the top of that, sprinkle a mixture of breadcrumbs and parmesan (about 1 tbsp of each). Bake at gas mark 5/190 C for about 30 minutes, or until the topping is brown.
These layers of celeriac are not complete. I had three layers; but there were plenty of gaps between them.
Thursday, February 15, 2007
Orange and lemon mousse cake
The search for the perfect cheesecake -- or rather, the one that perfectly matches my favourite cheesecake ever -- continues. I quite like the fudgy, mouth-coating "New York" versions; but not as much as I like ones with light, mousse-like toppings.
This one is not quite it, being too creamy. But it is good in its own right. I got it from the BBC Good Food website (here). My version has less biscuit, because I used a 20 cm cake tin; less fromage frais, because 400 ml was all I had; and lemon zest in place of the berries, because it is not summer.
150 g digestive biscuits
75 g butter
4 leaves gelatine
142 ml single cream
400 g fromage frais
100 g caster sugar
Zest of 1 lemon and 1 orange
4 tbsp orange juice
284 ml double cream
Place the base of a 20 cm, springform cake tin on to a sheet of greaseproof paper, draw round it in pencil, and cut out the shape. Smear some butter on to the base. Stick the paper on top.
Whizz the biscuits in a food processor; or put them in a plastic bag, tie it up, and bash them with a rolling pin. Melt the butter over a gentle heat in a saucepan. Tip in the biscuit crumbs, and mix. Spread the crumbs over the cake tin base, compacting them with the back of a spoon. Crumbs will fall off the side. Do the best you can to get a level layer of compacted crumbs to the edge of the base. Put the base into the freezer.
Soak the gelatine leaves in cold water. Meanwhile, heat the single cream gently in a saucepan. After four or five minutes, the gelatine will be soft and slithery; squeeze out the moisture. When the cream is bubbling, take it off the heat. Stir in the gelatine leaves, one by one. Unlike powdered gelatine, they dissolve very easily. Allow to cool.
Beat together the fromage frais, sugar, orange and lemon zest, and orange juice. Stir in the gelatine mixture. Whip the double cream until it forms peaks, but stop before it stiffens.
The recipe tells you to "fold" the double cream into the fruity mixture. But you have to stir it in quite thoroughly, or the cream will remain in blobs.
Attach the biscuit base to the rest of the cake tin. Pour in the mousse mixture, cover with clingfilm, and chill. It needs at least three hours. You might want to make the cake the day before eating it.
To serve, run a knife between the mousse and the tin, and release the spring.
Wednesday, February 14, 2007
Carrot and white radish salad
 I was grateful to Growing Communities for supplying a recipe with the white radish that came in the vegetable box last week: I would not have known what to do with it otherwise. The recipe included rice vinegar; but, since using the last of mine, I have been unable to find any more in my local shops. The sunflower seeds are my suggestion.
1 medium carrot
Same quantity white radish
1 tsp salt
2 tbsp sunflower seeds, toasted in a dry pan
1 tbsp red wine vinegar
1 tbsp sesame oil
1/4 tsp soy sauce
1/4 tsp sugar
Dash of cayenne pepper
Peel the carrot and radish, and cut into julienne strips. (I cut the vegetables into 2.5 cm lengths, cut them again into thin wedges, and cut these wedges into thin strips.) Put the strips into a bowl or colander, mix with the salt, and leave for one hour. Squeeze out the liquid.
Put the carrot and radish into a serving bowl. Add the other ingredients, and mix.
The colour of the vegetables will have faded. But the flavour is lively.
Tuesday, February 13, 2007
Boiled rice
I reviewed a book called The English Breakfast by Kaori O'Connor in the Guardian at the weekend. Here is the review; and here, for free rather than for £65, are Colonel Arthur Robert Kenney Herbert's complete instructions for cooking rice.
"For the rice there is only one method, easily learnt. Having cleaned and sifted the rice -- say six ounces -- prepare a large vessel of boiling water, a gallon not too much, put into the water a dessertspoonful of salt, and the juice of half a lemon to preserve the whiteness of the grains. When the water is at a gallop -- fully boiling -- throw in the rice, and stir it round with a wooden spoon; watch the clock for 10 minutes, stirring every now and then; after 10 minutes, test a few grains by pinching them between finger and thumb; as soon as soft, probably in 12 or 13 minutes according to the size of the grains, stop the boiling instantly by a dash of cold water, immediately remove the vessel, and drain off every drop of water from the rice, returning the latter to the now dry, hot pot in which it was boiled. Shake well, replace this upon the hot plate, or put it in front of the fire (a moderate heat required), and cover the rice with a folded cloth -- do not use the lid -- shake the vessel now and then, and after 10 minutes' rest the rice will be fit to serve. The last process is necessary to dry out and disintegrate the grains.
"N.b. Never soak rice before boiling, or put it into cold water, as some advise."
 The colonel is sound, I think. As I have written here before, I have trouble with the absorption method of cooking rice: after even my most successful efforts, the rice is stickier than it would be after boiling. I use Tilda Basmati; I toss it into boiling water (sometimes salted, sometimes not -- it doesn't seem to make much difference to the texture); I boil it for 10 minutes. It is perfect every time.
When I was researching my book, Tilda assured me that its rice did not need pre-washing. It does not discolour, in my experience; so acidulating the water, as the colonel advises, is not necessary. I do not see why you need to stop the water boiling if you are going to drain the rice immediately. No doubt I should allow the rice to dry in the pan; but I usually let it give off steam for a minute or two in the sieve, before serving.
Monday, February 12, 2007
Rocco
My New Statesman column this week is about Rocco, owner of the deli in Highbury Park. Rocco died last month, at the age of 66. His funeral was packed.
Here's a very simple pasta dish, in tribute to Rocco's excellent pancetta. Each week, I would buy slices of pancetta, which I would grill as a more delicious alternative to bacon; and I would buy chunks, to cube for carbonara or other pasta dishes, or to stir into mashed potato.
For 2
250 g spaghetti
100 g pancetta, cubed
1 clove garlic, chopped
1 or 2 small, dried chillis (optional)
Olive oil
Parmesan, grated
Put a large pot of water on to boil. As it starts bubbling, splash a little oil into another saucepan, throw in the pancetta with its rind if you have it, and set the pan over a gentle heat. It will cook in roughly the time it takes to soften the spaghetti.
Add salt to the boiling water -- the usual rule is one tsp for each litre; add the spaghetti, and stir. The packet will give you a general guide to the timing, but not an infallible one. Keep checking and tasting the spaghetti; it should be al dente, giving a hint of residual firmness as you bite into it. If you go beyond this stage, you'll find that the spaghetti will become too soft, because it carries on softening for a while after you've drained it.
Meanwhile, stir the pancetta from time to time. You may find that it and the rind have given off quite a bit of fat. Yum. About two minutes ahead of when you expect the spaghetti to be ready, add the garlic and chilli (if using) to the pancetta. You want the garlic to soften and perhaps to brown a little, but not to burn.
Drain the spaghetti. I set the colander back over the pan to catch the last cupful of draining water. You sometimes want a little pasta water to loosen the pasta and sauce mix.
Tip the spaghetti into the pancetta, and toss. Serve with parmesan.
If you're using chilli, you might prefer breadcrumbs to cheese. Whizz a slice or two of white bread (I use the crusts as well); toss them with a little olive oil over a medium heat until browned. Sprinkle the crumbs over the spaghetti.
Friday, February 09, 2007
Toasting spices
I made a dhal last night, and I have written about the dish before, so I'll make just a couple of observations. The first is that I recommend a brand of chilli powder called Crazy Jack. The second is on toasting spices. Warming them in a dry pan until they give off a toasted aroma enhances their flavour; and it makes them brittle, enabling them to be ground easily in a mortar. But beware if you plan them to simmer them for a while in a curry: that aroma -- odour is a better term for it now -- will stick around for several days.
The only other cooking odour that has clung to the house for so long was that of deep-fried, battered fish. In every other respect, my battered fish was a success, and not as difficult to prepare as you might imagine -- to summarise, I simply coated the pieces of fish in a batter that was extra thick and clinging, and dropped them into hot oil. But I shall not try it again.
The only other cooking odour that has clung to the house for so long was that of deep-fried, battered fish. In every other respect, my battered fish was a success, and not as difficult to prepare as you might imagine -- to summarise, I simply coated the pieces of fish in a batter that was extra thick and clinging, and dropped them into hot oil. But I shall not try it again.
Thursday, February 08, 2007
Cheese and potato pie
The provincial French version of this dish is the Auvergnois aligot, for which you add cantal cheese to mash, stirring over heat until the mixture is glistening, with the texture of soft, degradable chewing gum (if you see what I mean). There are all sorts of variations. I sometimes add lardons. Nigel Slater, in the Kitchen Diaries, has a delicious, baked version with blue cheese and onions. The version below (for two) is comfort food for a cold evening.
4 medium potatoes
1 garlic clove
25 g butter
Plateful (150 g to 200 g, according to taste) cheddar
Pepper, nutmeg
2 tbsp breadcrumbs, mixed with 1 tbsp parmesan
Peel the potatoes, and cut them into chunks about 2 cm square. (I cut the potatoes crosswise into three, then divide each section into three or four chunks.) Put them, with the garlic clove, into cold, unsalted water, and simmer gently until soft.
Note: I think that I gave bad advice when I suggested, on the grounds that salt speeds softening, that you salt the water when you make mashed potatoes. Parts of the potato are more likely to become mushy, producing a gluey result. For an entertaining account of the search for perfect mash, read Jeffrey Steingarten's essay on the subject in The Man Who Ate Everything.
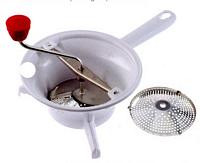 Back to the pie. Drain the potatoes, return them to the dry, hot pan to steam for five minutes, and mash them. I sometimes use a masher; more often, a vegetable mill (mine's a Mouli-legumes). Stir in the cheese and butter, and season with ground black pepper and a grating or two of nutmeg. Owing to the quantity of salty cheese, you probably do not need more salt.
Pile the cheesy mash into an oven dish, sprinkle with the breadcrumbs and parmesan, and bake at gas mark 6/200 C for 20 minutes, or until the topping is brown.
Wednesday, February 07, 2007
Pestle and mortar
My Moulinex electric herb mill has broken. I didn't use it for herbs, apart from curly parsley and rosemary -- it would have reduced them to mush. But it was very useful for whizzing chillis, pine nuts for pesto, and small quantities of breadcrumbs. A quick search online suggests that Moulinex doesn't make them any more. Would a hand-held mill perform the same jobs, I wonder?
 Meanwhile, how to chop chillis? Recipes tell you to "crumble" them, as if they splinter under pressure like bits of stale bread. As if. You can't dice little chillis on a chopping board. So yesterday evening I put them in my mortar, and ground them with the pestle.
It requires a bit of effort, but it works. Even dried chillis, however, have some moisture, which, as the pestle crushes them, stains the mortar. It seemed to me that the chillis had left behind some of their heat on the utensil.
Still, my pestle and mortar is (are?) one of my most useful pieces of kitchen equipment. I grind spices with it, make pesto with it, and also make mayonnaise with it, blending the egg and the oil with the pestle.
Tuesday, February 06, 2007
Braised lamb shanks
You may own recipe books describing lamb shanks as underrated cuts of meat, perfect for cooks on a budget. Those books were written before 1990, when shanks started appearing on fashionable tables. Still, they remain cheaper than leg; and they are particularly succulent.
They may be slow-roasted, like a shoulder (see here, or here). Or, because the meat is so crammed with connective tissue and fat, they may be braised -- a process that dries out leaner meats.
I assume here that you have small shanks, each a serving for one person. But they are often larger than that.
2 onions, chopped
1 carrot, chopped
1 stick celery, chopped
1 bay leaf, 1 sprig rosemary
1 head garlic, separated into cloves
4 lamb shanks
Salt
In a casserole large enough to contain the shanks, soften the onion, carrot and celery in about 2 tbsp olive oil, adding a little more oil if the vegetables start to catch.
Meanwhile, in a frying pan, heat some groundnut or sunflower oil (which takes a higher heat than olive oil) over a medium flame, and brown the shanks all over. You'll probably need to do it two at a time.
When the vegetables are golden, lay the browned shanks on top, and throw in the garlic cloves, bay leaf and rosemary. Grind over some salt. (I prefer to add pepper at the table -- it can go bitter if stewed for a long time.)
Cover the pot, and put it into a gas mark 1/140 C oven. Check after an hour; if the braise is starting to simmer, you can turn down the heat to 130 C, or lower if your oven will go lower than that (mine won't). Simmer, very gently, for a further two hours, turning the shanks from time to time.
Lift the shanks from the liquid (the meat and vegetables in my casserole at the weekend had thrown off about a litre of it) on to a plate. Strain the liquid through a sieve into a bowl. Return the shanks to the casserole, cover, and put it back into the bottom of the oven.
If you have a glass bowl, you can see the substantial layer of fat on top of the liquid. Spoon it -- the fat -- off (not into the sink, because it will solidify); when the layer of fat is too thin to spoon off accurately, you can dab at it with paper towels.
You can discard the vegetables, with the exception of the garlic, from the sieve -- they have given up their flavour. Squeeze the garlic from the hulls into the sauce. Pour the sauce into a saucepan, and simmer it to reduce it to the thickness and flavour you like. Remember that the salt in it will concentrate, so keep tasting.
Serve the shanks in a dish, carving off the meat at the table; serve the sauce in a jug.
Monday, February 05, 2007
Spotted dick
Having said that I am not a fan of Gordon Ramsay's Times column, I found in it another recipe appealing to my wintry yearning for steamed puddings. Here it is. (You have to scroll through the pages. Note also that the Times has a redesigned website, which, as I write this, is loading extremely slowly.)
I prepared this pudding as I did Ramsay's lemon one, in a glass bowl, with greaseproof paper and then three layers of foil wrapped round it.
My golden syrup stuck to the side of the bowl. I smeared it on with the back of a spoon. Perfect.
As the recipe says, the batter is sticky: the cooked pudding emerges slightly crumbly in places. You might want to use just a little more milk, for that genuinely institutional, stodgy texture.
Again, I was too lazy to make the custard. We ate the pudding with cream.
 Here it is. (You have to scroll through the pages. Note also that the Times has a redesigned website, which, as I write this, is loading extremely slowly.)
I prepared this pudding as I did Ramsay's lemon one, in a glass bowl, with greaseproof paper and then three layers of foil wrapped round it.
My golden syrup stuck to the side of the bowl. I smeared it on with the back of a spoon. Perfect.
As the recipe says, the batter is sticky: the cooked pudding emerges slightly crumbly in places. You might want to use just a little more milk, for that genuinely institutional, stodgy texture.
Again, I was too lazy to make the custard. We ate the pudding with cream.
Friday, February 02, 2007
Chicken with 40 cloves of garlic
You want as little moisture and odour as possible to escape from this simple but intoxicating dish. The idea is that you lift the lid from the pot at the table, releasing a rush of garlicky vapour. In my favourite cookbook, 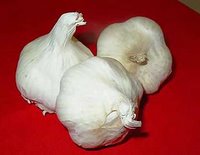 Richard Olney (scroll down to find him) recommends making a flour and water paste, which you form into a thin sausage shape and place over the rim of the pot: it makes a seal when you clamp on the lid. On the couple of occasions when I have tried this method, I have found that the lid -- which I may have clamped on too firmly -- has squeezed the pastry from the rim, rendering it entirely ineffective. Still, the lid of a Le Creuset fits quite tightly.
I used a whole, Label Anglais chicken. The advantage is that it is of higher quality than the thighs and drumsticks you can buy separately; the drawback is that the breast cooks for longer than is necessary, and may dry out and toughen. You could, if you were prepared to break the rule about lifting the lid of the pot, add the breast portions half an hour from the end.
Richard Ehrlich, in his engagingly helpful The Perfect . . . (also published by Grub Street, and featured on the page that advertises Olney's Simple French Food), says that you need "an absolutely disgraceful quantity" -- up to 300 ml -- of olive oil, in which the garlic cloves can stew. I am happy to let them steam.
The timings here suit my oval Le Creuset, which takes a long time to heat up. They also suit my taste for meat that falls off the bone -- but are not ideal for the breast meat.
1 chicken, cut into 8 pieces
4 heads garlic, separated into cloves
3 tbsp olive oil
Herbs: rosemary, thyme, tarragon (according to taste)
Salt, pepper
Toss the ingredients in a casserole. Bake, covered, at gas mark 4/180 C for one hour; and then at gas mark 1/140 C or lower for a further hour.
 Richard Olney (scroll down to find him) recommends making a flour and water paste, which you form into a thin sausage shape and place over the rim of the pot: it makes a seal when you clamp on the lid. On the couple of occasions when I have tried this method, I have found that the lid -- which I may have clamped on too firmly -- has squeezed the pastry from the rim, rendering it entirely ineffective. Still, the lid of a Le Creuset fits quite tightly.
I used a whole, Label Anglais chicken. The advantage is that it is of higher quality than the thighs and drumsticks you can buy separately; the drawback is that the breast cooks for longer than is necessary, and may dry out and toughen. You could, if you were prepared to break the rule about lifting the lid of the pot, add the breast portions half an hour from the end.
Richard Ehrlich, in his engagingly helpful The Perfect . . . (also published by Grub Street, and featured on the page that advertises Olney's Simple French Food), says that you need "an absolutely disgraceful quantity" -- up to 300 ml -- of olive oil, in which the garlic cloves can stew. I am happy to let them steam.
The timings here suit my oval Le Creuset, which takes a long time to heat up. They also suit my taste for meat that falls off the bone -- but are not ideal for the breast meat.
1 chicken, cut into 8 pieces
4 heads garlic, separated into cloves
3 tbsp olive oil
Herbs: rosemary, thyme, tarragon (according to taste)
Salt, pepper
Toss the ingredients in a casserole. Bake, covered, at gas mark 4/180 C for one hour; and then at gas mark 1/140 C or lower for a further hour.
Thursday, February 01, 2007
Pricking sausages
There is time only for a short entry today. It concerns a subject that is an obsession of mine. I adore sausages, and I want them to be perfect every time; but the perfect method of cooking them is elusive. They require just as much care as do much grander foodstuffs.
Slow frying is my favourite technique. But I like to vary things, so at the weekend I tried slow baking, at gas mark 1/140 C, giving them an hour. After 40 minutes, it became clear that they would not be brown enough, so I turned up the oven to gas mark 4/180 C. Of course, a couple of the sausages split; and the skins toughened up.
Pricking sausages, to avoid splitting, has come to be frowned upon. It was a common recommendation in the days when the name "bangers" was applied with good reason. But I have been reading, as a result of a commission, a book called The English Breakfast, which contains reprints of three Victorian recipe books, and I came across an instruction to prick sausages all over with a needle; it got me thinking about whether this procedure is really so damaging. Of course, it allows juices to escape. But a lot of juices escape anyway, as you will know from a comparison of the size of sausages before and after cooking. Pricking prevents splitting, which is much more likely to occur, I find, than recipe writers acknowledge.
Subscribe to:
Posts (Atom)