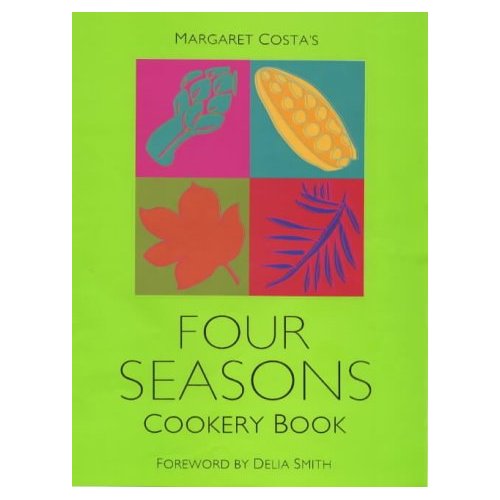
Margaret Costa's Four Seasons Cookery Book is an inspiring work. In 1970, when the book first appeared, Costa's seasonal structure was unusual; now, of course, everyone uses it.  She arranges the recipes thematically: you get dozens of pear and apple dishes in the autumn chapter, for example. There is nothing fancy about the descriptions, and there are no pictures; but the abundance of appealing ideas makes you want to get into the kitchen right away.
The language of the recipes is straightforward; but some of them do require a little experience to negotiate safely. Perhaps that's my excuse for a couple of not entirely successful ventures.
Making the cold caramel souffles, I should have done a little research into gelatine, or at least read the packet instructions, first.
You start by making a caramel with 300 ml water and 115 g sugar.
For the souffle: 15 g powdered gelatine; juice of 1 lemon; 2 eggs; 1 egg yolk; 2 tbsp caster sugar; 90 ml softly whipped cream; 2 egg whites.
My first mistake, I think, was with the caramel. You put the water and the sugar into a saucepan on a low heat until the sugar dissolves, then turn up the heat and cook until the syrup is golden brown. I used golden caster sugar, so I had a golden liquid already -- I was not confident that I could distinguish between this colour and caramel. I was too timid, and arrested the cooking early. Then I added, as Costa suggested, 4 tbsp hot water.
I had leaf gelatine. I assumed that one leaf would be about the equivalent of the powdered gelatine specified.
The recipe continues: beat the whole eggs and the yolk with the sugar in a bowl suspended above hot water, until the mixture increases in volume and thickens. Remove from the heat. At this point, I stirred in the gelatine, which I had softened for 4 minutes in cold water, and stirred until I was sure that it had dissolved. I added the (thin) caramel and the lemon juice. I covered the bowl, and put it in the fridge.
You're supposed to wait until the mixture begins to thicken. Two hours later, it was showing no inclination to do so. I decided that it needed another leaf of gelatine, which I softened in water, then melted in a pan on a low heat. I added my runny mousse to this pan, stirred thoroughly, and poured the mixture back into my bowl.
Time was moving on. Instead of waiting, I beat the egg whites, and folded them and the whipped cream into the eggy lemon. I poured the mousse into four glasses, covered them in clingfilm, and put them in the fridge.
Two and a half hours later, when we came to eat our puddings, they were still not set, although they had thickened slightly. There were two layers: a foamy mousse, and a lemony jelly.
Two hours after that, the single mousse left in the fridge had at last reached the right consistency. I ate it for lunch the next day. Perfectly pleasant; but it offered too weak a hint of caramel.
While I was fussing over the braised belly pork and the lentils, some red cabbage was maturing uncomplicatedly in the oven.
Red cabbage goes well with acidic things, in part because the flavours complement it, and in part because the acid preserves, even heightens, the purply red colour.
I have a ceramic oven dish that will also go on the hob. I put it on a gentle flame, poured in about a tbsp of groundnut oil, and softened a chopped onion. Meanwhile, I chopped half a small cabbage and an apple, turning the apple pieces in the juice of half a lemon -- it stops them going brown. When the onion was soft, I added the cabbage and the apple with its juice, half a tbsp of caraway seeds, a star anise, a little salt and a sprinkling of vinegar, and stirred everything up. I covered the dish with foil, and put it in a gas mark 2/150 C oven for an hour and a half. All I had to do was to check after about 45 minutes to make sure that the dish was progressing nicely.
My ceramic dish is quite thick, and does not cook things quickly. The cabbage retained a satisfying crunch. It was quite sharp -- possibly too sharp for some tastes. I might have put the chopped apples into acidulated water, draining them of liquid before adding them to the cabbage and onion; or I might have left out the vinegar.
The easiest way to cook Puy or other green lentils is to simmer them in water, drain them, and stir in flavourings such as fried onions and garlic, celery, and parsley. But yesterday, with the braised belly pork, I thought that it would be a shame not to flavour the lentils with the pork broth, which I did not want to discard; so I cooked them (about 50 g for each person) by a kind of absorption method. It's as difficult to get right as it is with rice.
I rinsed the lentils in a sieve under running water. Then I put them in a saucepan, covered them in broth with about 2 cm to spare, brought them to a simmer, put on the lid, and turned down the heat. You can never tell how much liquid the lentils will absorb. These were drying out after about 10 minutes, so I added more broth. But I did not want to pour in too much, because at the end of cooking I hoped that there would be only a little liquid remaining. Add too little, though, and the lentils won't soften. So I had to top up with broth, check again after five minutes, taste the lentils to try to guess how much longer they needed, add more broth, and repeat. This is supposed to be a humble foodstuff.
Meanwhile, I softened an onion and a clove of garlic in olive oil until they were golden.
The lentils were softening after about 35 minutes. I removed the lid, stirred in the onion and garlic mixture, added a little salt and a lot of pepper, and allowed the liquid to evaporate.
The third component of this meal, red cabbage, required a lot less attention. Details tomorrow.
After roasting a joint of belly pork a few weeks ago, I thought I would try a braised version. There is a recipe in Roast Chicken and Other Stories by Simon Hopkinson.  You cover a 1.8 kg joint with 2.3 litres of water, including in the broth dry sherry or sake, star anise (3), a cinnamon stick, slices of root ginger, dry chilli, soy sauce, redcurrant jelly, balsamic vinegar, and garlic cloves (30), with coriander sprigs, spring onions and a fresh chilli for garnish.
I had a 0.8 kg joint, and I did not have sake or sherry, cinnamon, redcurrant jelly, balsamic vinegar, or the garnish. But I used the other ingredients, scaled down; and added a couple of tbsps of rice vinegar. Hopkinson tells you to bring the water to the boil, and then to add the meat; I poured cold water over the meat, then brought the pan slowly to simmering point. At that point, I skimmed the surface of the liquid, and added all the other ingredients, rather than doing so in the stages Hopkinson recommends.
I cooked the braise on the hob, because I had another dish to go in the oven. Hopkinson tells you to cover the pan; but I find that a covered pan on even the lowest flame on my hob bubbles more energetically than is good for the meat. I put a heat disperser under the pan -- a Le Creuset casserole; but when all hints of bubbling disappeared from the surface of the liquid I began to worry that the temperature had got too low. I might have taken off the lid; but then liquid would have evaporated, and had to be replenished in order to keep the pork covered. So I spent a good deal of time faffing around, making little adjustments.
No doubt I should have been more relaxed about it: belly pork is a forgiving cut of meat. I simmered it for two and a half hours.
Hopkinson says that you should remove the pork, garlic and slices of ginger to a serving dish before reducing the sauce to a syrupy consistency. There had been very little evaporation from my casserole. Reducing the two litres of broth to a syrupy consistency would have required about half an hour of fast boiling.
I boiled the contents of the casserole for about five minutes, to concentrate the flavour a little. Then I added a couple of ladlefuls to the pork, as a flavoursome moistening agent. I kept the rest of the broth to use in a soup.
This is a typical story of a home cook and a recipe book. You do not have all the ingredients; the recipe does not work as described; but, with a bit of improvisation, you can still end up with something very nice.
My favourite ever cheesecake was on the menu at a hamburger restaurant in Exeter. It -- the cheesecake -- had a crunchy, chocolaty base and a lemony, mousse-like topping. It probably came out of a packet.
Nothing I have eaten since has quite matched that ideal. You might point out that what I am after is not proper cheesecake; and it is fair to see that the heavy, mouth-coating variety is not so much to my taste. Nevertheless, I have tried making what is sometimes known as "New York Cheesecake", with mixed results.
Nigel Slater has a recipe of this kind in his Kitchen Diaries. You make it in a springform cake tin placed in a bain-marie, wrapping the tin in a double layer of foil to keep out the water. Alas, I failed to do a proper sealing job. We ate a soggy base -- a dispiriting thing in a cheesecake. The topping was very nice, though.
I tried another version, from Olive magazine (a delicious lemon mousse from which has featured here). The base included hazelnuts as well as biscuits and butter; the topping featured a lot of cream cheese (900 g), with sour cream, eggs, flour, and vanilla essence. Olive did not recommend a bain-marie. It suggested a cooking time of about 40 minutes at gas mark 1 (140 C). The centre of my cake was not nearly ready by then; it was still liquid after an hour and a half. After another quarter of an hour it was wobbling, and I felt confident that it would set once cooled.
The centre of the cake was light and fluffy, but the rest was rather dense. A bain-marie -- sealed by a competent person -- might have helped to protect the perimeter of the cake and to spread the heat more efficiently.
Olive tells you to put the base into the oven first to help it to firm up; but I am not sure that oven heat has that effect. Better, surely, to put the base into the fridge, or even into the freezer. We ate some of this cheesecake, because of my bad planning, four hours after I had cooked it. The biscuit and hazelnut mix was soft, but crunchier when we ate the leftovers the next day.
I am not sure what proportion of butter to biscuit produces the crunchiest result. Some recipes give 1 g of butter to 2 g of biscuit; others, a 1:3 ratio.
I still like the inauthentic cheesecake in my book. But I may have found one -- it has mousse in the title -- that comes even closer to reproducing my experience of long ago. I shall keep you posted.
Some squeaky-fresh chard arrived in the vegetable box yesterday. It was multicoloured: green of course, and purple, crimson and yellow. Someone should have painted it before we ate it.
I suppose that a very simple preparation, involving a speedy cooking, would have flattered the freshness best. But it is hard to resist returning to old favourites; and I am particularly keen on chard gratins.
You can eat both the leaves and the stalks (the stalks are more highly valued); but they require different cooking times. I washed the chard in a bowl, folding the halves of each leaf together and stripping them from the stalk. I cut the stalks into lengths of about 2 cm, and put them into a saucepan with a layer (about 1.5 cm) of simmering water and a knob of butter. I put the lid on. After about 10 minutes, I removed the lid, turned up the heat, and allowed the liquid to evaporate until the stalks were covered in thin, buttery juices.
Meanwhile, I cooked the chard leaves as I do spinach: I shoved the wet leaves in a saucepan, clamped on the lid, and put the pan above a high heat. After a couple of minutes, I took off the lid and stirred the collapsing leaves. I put the lid back on for another minute, then drained the chard, pushing down on the leaves with a wooden spoon to squeeze out the liquid.
There was a decent-sized portion for two. I made a bechamel with a third of a pint (about 190 ml) of milk. (There is a recipe for bechamel, albeit a double-thick one, in my entry on Alsace Onion Tart.) I stirred in about four tbsps of grated pecorino cheese. Then I stirred in the chard leaves and stalks, and added a little salt (the pecorino is salty), a lot of black pepper, and some scrapings of nutmeg. I tipped the mixture into a gratin dish, and put it into a very hot (gas mark 8, 230 C) oven for about seven minutes, by which time it was bubbling.
That was long enough. You can wait until the surface of the gratin goes brown: but that means a longer cooking of (and greater loss of nutrients from) the chard, as well as a drying up of the sauce.
I might have given the gratin a topping of breadcrumbs, or of parmesan, or of breadcrumbs and parmesan mixed, and finished it with a browning under the grill. Sometimes I leave out the bechamel, simply giving the chard a breadcrumb and parmesan crust.
I reported on my trial of Heston Blumenthal's technique, recommended in his television programme, for cooking sausages. You poach them at 65 C for 20 to 30 minutes (TV programme and Sunday Times version varied), then fry them. It seemed to work well. But I neglected to validate the trial with control sausages.
So I put two sausages to fry in my normal way: heavy pan, heat disperser, a little oil, very low flame. Turning them every so often, I gave them about 40 minutes to cook. Meanwhile, I heated a pan of water until bubbles started to appear, turned down the flame, put another heat disperser under the pan, and dropped in two more sausages. After the compromise time of 25 minutes, I removed them, placed them on paper towels to dry, and fried them -- starting them on a medium flame, turning them frequently, and, in an effort to prevent splitting, lowering the flame as they started to brown. They were ready in about eight minutes.
There was little to separate the two versions. The only significant difference was to the debit of the Blumenthal technique: the poached sausages had somewhat rubbery skins. You, or Blumenthal, might suggest that my poaching water was hotter than 65 C; and I could not gainsay that charge. But, as I do not have the equipment to maintain a simmering liquid at a precise temperature, I shall revert to my previous, slow-frying method.
That reduces the number of useful techniques I have gleaned from In Search of Perfection to nil. I'm enjoying it, though.
I had a couple of small squashes, three carrots and a parsnip remaining in my organic box. A curry was in order. Apologies to purists; but this was home cooking for two on a Monday night.
I also had the tops of some leeks, a few sections of spring onions, and parsley. I boiled about a litre of water, shoved in the vegetables and herb with a chopped onion, and simmered them for 30 minutes to make a vegetable stock.
Vegetable curry for 2
2 small squashes
3 carrots
1 parsnip
2 onions
1 clove garlic
1/2 tsp caraway seeds
1/2 tsp cumin seeds
5 cardamon pods
1/2 tsp turmeric
1/3 tsp chilli powder
40 g creamed coconut
Vegetable stock
Groundnut or sunflower oil, butter
Salt
Cut the squashes, carrots and parsnips into fork-sized pieces. You may want to get rid of the woody cores of the parsnip; I slice the vegetable lengthways into quarters, then cut out the central bits. Place the pieces in a baking tray, and toss with groundnut (or sunflower) oil, the caraway and cumin, and some salt. Bake at gas mark 6/200 C for an hour, or until tender.
Slice the onion, chop the garlic, and crush the cardamon to release the seeds. Gently fry them in a tbsp (or more, if necessary) of groundnut (or sunflower) oil and butter combined, until brown.
Tip the cooked vegetables into the onion mixture with the coconut, vegetable stock, turmeric and chilli. Add a little stock at a time; the vegetables will absorb it, and the sauce will thicken. Keep adding stock until you have the consistency you want. Simmer for about five minutes. Check the seasoning, adding more salt and chilli if you like.
It is a pity that I did not have fresh coriander and chillis, which would have made a nice garnish.
Notes
Baking the vegetables. You could, of course, simply simmer them in the stock with the fried onion and garlic; but I like the sweetness that baking concentrates in them.
Butter and oil. Butter goes brown when heated; so it helps the onions and garlic to brown. But you have to be careful that it does not burn. And you have to be patient, attending to the pan for at least 20 minutes.
Cardamon. I love the citrus notes that cardamon imparts. It seems easier to fry the spice (I usually throw in the pods as well) than to extract the seeds and toss them with the vegetables before baking.
Coconut. The Biona brand conveniently divides 200 g of creamed coconut into five sachets, rather than presenting it in a block.
I love fresh sardines, but in their place -- outdoors. Grilled in the kitchen, they aromatise -- and not in a pleasant way -- the furthest reaches of your house. The worst of the smells come from the fats that burn under the fierce flame.
Cooking them in the oven limits the damage. Heat the oven, at its highest setting, for 30 minutes. Lay the sardines in a baking tin, season with salt and pepper, and put them on the top shelf of the oven. They will be ready in five to 10 minutes, depending on size.
Sardines for four cost me £3.10.
I continue to experiment with the ingredients in chocolate mousse. Elizabeth David tells us that the standard recipe is 4 oz (115 g) chocolate with four eggs; and I think that her advice remains sound. More modern recipes often double that quantity of chocolate, losing, to my taste, the soft texture that a mousse should have. I have come to the conclusion that I do not like to include whipped cream: it enrichens the mousse in a rather cloying way.
Last weekend, I had two egg whites left over from another dish, and two whole eggs. By chance, I may have hit upon the perfect recipe.
 115 g dark chocolate (I like Green & Black's in a mousse)
25 g cold butter, cubed
2 egg yolks
4 egg whites
Break up the chocolate, and place it in a glass bowl that you can suspend above simmering water in a saucepan, or in the top bit of a double boiler. Melt the chocolate. Stir in the butter, then the egg yolks. Whip the whites until they form peaks. Fold them into the chocolate. Pour the mixture into ramekins, cover with cling film, and chill.
This will make six after-meal treats, or four puddings if you're giving them to guests.
Notes
You could simply melt the chocolate in a saucepan; but you have to be careful, because it goes grainy if overheated. I am told that a microwave works well.
The chocolate goes stiff when you stir in the egg yolks. I am always dismayed by this reaction, because I want the mousse to be light; and I wonder what a mousse would be like if one made it simply with chocolate, a little butter, and egg whites. But you can loosen the mixture a little by stirring in some egg white, before folding in the rest more carefully.
Gordon Ramsay gave a recipe involving dried haricot or cannellini beans in the Times the other week. (I cannot find it online.) Soak the beans overnight, he advised; cover them with fresh water, fast-boil them for 10 minutes, turn down the heat and simmer for an hour, or until soft. He did not explain these instructions. What is the point of them?
I have found it difficult to get authoritative information about the cooking of dried legumes. But I have come to a few conclusions.
Salt. Most cookery writers tell you not to add salt to  the water in which beans or pulses are cooking. It toughens the skins; it inhibits softening. I have found that dried beans will soften in salted water -- in the water that comes from my taps in North London, anyway. However, I thought that I should test this finding again.
I put two lots of beans -- they were organic haricots -- on the hob: one in unsalted, the other in salted, water. I tasted them after an hour. Both were cooked; but they had different textures. Behaving exactly according to the observations of Harold McGee in his great book, the salted beans had a mealy texture, while the unsalted ones were creamy. I shall leave the cooking water unsalted from now on, and season the beans when they are cooked.
Soaking. I set soaked beans and unsoaked ones to cook. The soaked beans were ready earlier; and, again, they had a more pleasing texture.
Fast boiling. The theory is that 10 minutes of fast boiling eliminates substances called protease inhibitors, which can block the digestion of proteins. However, protease inhibitors have beneficial effects too. My researches took me to Dr Claire Domoney of the department of metabolic biology at the John Innes Centre; she told me that protease inhibitors were, on balance, good things, and were in any event too stable to be affected by a short period of boiling on a domestic hob.
Red kidney beans. These contain lectins, which can cause stomach upsets. You should soak them (the Food Standards Agency recommends that you do so for 12 hours), fast-boil them for 10 minutes, and make sure that they are properly cooked.
Cooking the beans. Soak the haricot, cannellini or kidney beans -- I use filtered water, because hard water does toughen the skins, I find -- for five hours, or longer. Drain, cover in fresh, filtered water, bring to the boil, and simmer. Cooking times vary from 45 minutes to two and a half hours, or longer.
About 50 g for each person makes a decent portion as a side dish. I might allow for 75 g a person in a pork and bean stew or cassoulet. You can add an onion to the water; I usually throw in a garlic clove or two.
Drain the beans, retaining the water. Assuming you've cooked 200 g of beans: soften a clove of garlic in a tbsp of olive oil. Add a dstsp of tomato paste, the beans (with any garlic you have cooked with them), salt and pepper, and a tbsp or two of cooking liquid, to give a stew-like consistency. Simmer for 10 minutes. You can use the left-over cooking liquid for soups.
The usual way of preparing bulgur, or cracked wheat, is to soak it in water, drain it, and then squeeze out as much liquid as you can with your hands. Unfortunately, it remains rather damp. You can attempt to pour over just as much water as the bulgur will absorb; but the quantity is hard to judge, and insufficient water will leave you with a plateful of grit.
There are two possible remedies: to stir the squeezed bulgur above a low heat in a saucepan; or (better) to spread it on a baking tray and dry it in a low oven for five minutes.
 I go for the fine bulgur, and I cover it in cold water for 15 minutes. If I have coarse bulgur, I pour boiling water over it, and leave it for the same length of time.
The classic bulgur recipe is tabbouleh, made with plenty of parsley, mint, spring onions, and dressed with lemon juice and olive oil. I like a lot of pepper with it.
Other ingredients I like to mix into the bulgur include -- often in addition to the above: feta cheese (the Cypressa brand is good, I think, with a salty tang), black olives, toasted pine kernels (I put them in a saucepan above a low heat), grilled aubergines, roasted peppers, aubergines or other vegetables that have been preserved in oil and bottled. About 50 g of bulgur is a decent quantity for one person.
Yesterday, we got as far as assembling the stew.
Put it in a gas mark 2/150 C oven, for about two and a half hours. Meanwhile, make the dumplings: stir together the flour and suet with a little salt and pepper, and add enough water (probably about 5 tbsps) to make a pliable dough. Roll the dough between your palms into balls a little larger than golf balls.
Transfer the meat from the stew to a colander over a bowl. Strain the sauce through a sieve into a saucepan, pushing down on the vegetables to extract as many juices as possible, and adding any sauce that drained from the meat. Return the meat to the casserole, and put the lid on.
The sauce may be a little thin. Put the pan on to a moderate heat, letting the sauce bubble until it thickens slightly. Do not be too enthusiastic: you don't want something that congeals on the plate, or that, owing to concentration, has become unbearably salty. Taste it.
When the sauce is ready, pour it over the meat in the casserole. Bring the contents to a gentle simmer, throw in the dumplings, cover, and cook very gently -- either on the hob or in the oven -- for 20 minutes.
Notes
You do not need to bring the stew to a simmer before putting it in the oven. The  slow rise in temperature is good, because cuts such as chuck steak need very gentle cooking. But, in assessing the timing, you should have a rough idea of how your casserole dish and oven will behave. This stew in my 24 cm Le Creuset takes about an hour to come to simmering point at gas mark 2; but I have a larger, oval Le Creuset that seems to resist heat for a lot longer. Once the stew is simmering, I turn down the oven to its lowest setting.
You could cook the stew on the hob -- but that tends to set it bubbling at a faster rate than is ideal for the care of the meat.
You cover the meat with liquid because it will be cooler in its bath than it would be if exposed to oven heat and steam.
Check the state of the meat from time to time. Do not carry on cooking it after it has become tender.
After two and a half hours, the onion, carrot and celery have given up all their flavours to the stew, and are nutritionally null. I prefer to discard them.
 Suet is not as widely available as it used to be. The only stuff I could find was Atora Light vegetable suet. It worked fine. I was less sure about the organic flour I used: it gave a stodgy result, I thought. You could add parsley or other herbs to the dumplings, and/or parmesan cheese; you could enrich the dough with a beaten egg.
I shall have to spread this post over two days. That is not because making a stew is particularly complex; but it is something one does in various stages, each of which is worth a few comments.
The quantities below are what I cooked at the weekend. The stew fed three of us, and gave us seconds; with 700 g of beef, it would easily have fed four.
570 g chuck steak, cubed
1 tbsp plain flour
Olive oil, for frying
1 onion, chopped
1 carrot, chopped
1 stick celery, chopped
1 clove garlic, chopped
About 500 ml stock (the unusual base of mine was a chicken carcass and the bone from a roasted shoulder of lamb)
1 bay leaf
1 tsp nam pla (fish sauce) or Worcester sauce
Salt
100 g self-raising flour
50 g suet
Water
Stage one
Heat a heavy frying pan above a medium flame. In a bowl, toss the meat with the flour until the cubes are coated. Pour in about a tbsp of oil, and toss again. Brown the meat in batches, and transfer to a casserole.
Turn down the heat. Pour in another splash of oil, and immediately -- before the oil has a chance to burn -- add the onion, carrot, celery and garlic, stirring until they are soft and golden. Add them to the casserole, with the bay leaf, fish or Worcester sauce, a pinch or two of salt, and enough stock to cover the meat.
Notes
The sauce in a beef stew should be thickened slightly, I think. Browning the flour contributes to the colour of the sauce, and also tempers the floury taste. Apparently, it also diminishes -- but does not disable -- the thickening properties.
If you see a reference to "sealing" meat in a recipe, you know that the writer is either ignorant or a lazy reproducer of hackneyed terminology. Browning meat does not seal it; but it does make it more flavoursome, thanks to processes called Maillard reactions. You need only a little oil to facilitate these reactions. I have come to the conclusion that it is neater to coat the meat with oil rather than to heat a layer of oil in the pan. Brown the meat in batches, so that you do not lower the temperature of the pan; leave the cubes to fry for a minute or less, and turn once to brown a second surface.
Be cautious with the salt at this stage. Fish sauce and Worcester sauce (which add savouriness) are salty; and you may want to reduce the sauce later, increasing the salt concentration. Ground pepper in stews and stocks can become acrid; add it at the table.
Frying the vegetables sweetens them. If they start to brown, all the better for the richness of the sauce.
Tomorrow: simmering the stew and finishing the sauce; and the dumplings.
I drained a tin of sardines, and mashed them with a fork. I added chopped (flat leaf) parsley, chopped cucumber, black pepper, and about a dstsp of Encona Original Hot Pepper Sauce (a brilliant product).
This mixture was too loose to put in a sandwich; and the bread, which Good for Food on the Blackstock Road gets from the Spence Bakery in Stoke Newington, was so fresh and moist that I did not want to toast it. So I cut two slices, and piled the chilli sardines on top.
This lunch gave me as much pleasure as I might have got from, say, lobster ravioli in saffron sauce.
I halved a red pumpkin, scooped out the seeds and stringy stuff, anointed it with a little olive oil and some caraway and cumin and salt, and put it in a gas mark 6/200 C oven. While it was cooking, I chopped an onion and a clove of garlic, and fried them in olive oil until soft and golden.
The pumpkin was not quite soft after an hour. I turned down the oven to gas mark 4/180 C (high enough to continue the cooking process, but not so high as to scorch the flesh), and gave the pumpkin another 30 minutes.
I poured four ladlefuls of stock on to the onion and garlic, and brought the pan to a simmering point. I scooped the flesh from the pumpkin shells, added it to the pan with a little more salt, and simmered for five minutes. I blended the soup with a stick blender. I threw in some chopped parsley.
It was bland.
The next day, I reheated the soup with some more stock, garlic, spices, and a tin of cannellini beans. It was still bland.
The blandness of this pumpkin was, oddly, assertive. It was an enveloping nullity. Like a weak hi-fi component, or like a slow member of a walking party, it reduced its partners to its mediocre level. There is something depressing about that.
The same soup made with butternut squash would have been delicious.
Whenever I see on a menu panna cotta, the gelatinous Italian dessert, I order it. A creamy, vanilla-flavoured jelly: heaven. But, until this weekend, I had been wary of making it at home. Gelatine is an ingredient that makes me nervous. My one attempt to use the powdered stuff was a debacle; and advice on the quantities to use is inconsistent. However, when I came across some leaf gelatine in a local shop, I thought that I should give one of my favourite sweet things a go.
(What you should do with powdered gelatine, I think, is pour it into a small volume of water in a bowl. Leave it for five minutes to go spongy, then suspend the bowl above a pan of simmering water, stirring the mixture until the gelatine dissolves.)
Some recipes for panna cotta involve simply heating milk, cream, vanilla and sugar, stirring in the gelatine, and pouring the mixture into moulds. Others, such as those by Nigel Slater, tell you to whip a portion of the cream and to fold it into the gelatinous liquid. I decided to follow the latter course.
I was not confident about the quantity of gelatine. The packet says that five sheets will set a litre of liquid; but I assumed that I would need a lower proportion than that, owing to the thickening of the cream. I was serving eight people.
600 ml double cream
200 ml milk
2 vanilla pods
60 g icing sugar
3 leaves gelatine
Pour the milk and 400 ml of the cream into a small saucepan. Slice the vanilla pods from end to end, scrape the seeds into the milk and cream, throw in the pods as well, bring the pan to a simmer, and allow the contents to bubble gently for five minutes. Meanwhile, soak the gelatine in a small bowl of cold water. After about four to five minutes, it will become slithery. Take the pan off the heat, remove the vanilla pods, lift the gelatine from the water, and stir it into the milk and cream until it dissolves. (It does so much more readily than does the powdered stuff.)
Whip the remaining cream with the sugar until the mixture makes soft peaks, but before it becomes firm. Fold the sweetened cream into the gelatinous cream and milk; pour everything through a sieve into a jug. Pour the mixture into eight ramekins, cover with clingfilm, and chill.
A little fruity acidity offsets a panna cotta nicely. I tipped a punnet of blueberries into a small saucepan with a dstsp of caster sugar, and heated them until they had burst and reduced to a compote-like consistency. I chilled this compote separately. Just before serving, I put a spoonful of compote on to each ramekin.
Some people like to turn out the panna cottas. The technique is to dip the ramekins briefly in hot water, before inverting them over plates.
Notes
After the panna cottas had been in the fridge for two hours, I was worried. They were still liquid. But they set during the following hour.
Some recipes, though not Nigel Slater's, tell you to let the gelatinous cream and milk cool and thicken a little before you stir in the whipped cream. That seems to make sense, because otherwise the whipped cream thins out on contact with the hot liquid. But I mixed them up right away, and got a very satisfactory result.
The potatoes with the roast shoulder of lamb were not a complete success. I should have cooked mash; but some children round here have been heard to grumble that mash is boring. I like potatoes cooked under the joint and crisped up at the end; but I did not want to give them eight hours in the oven. So I sliced and blanched the potatoes, checked on the meat 60 minutes early, and then decided.
The joint looked and smelled fantastic. The juices were too good to lose to absorption by the potatoes, I thought, so I took out the meat and made the sauce as I described yesterday, pouring it into a small saucepan. I tipped the potatoes into the empty roasting tin, and placed the lamb on top; I put the tin back on to the bottom of the oven.
That hour was pointless, potato-wise: their cooking did not progress at all. I took out the meat, put it in a warm dish, turned up the oven to gas mark 7/220 C, and put the potatoes on the top shelf. I checked after 15 minutes: there was hardly any fat in the tin, and the potatoes were dry, pale, and sticking to the bottom. I poured over some olive oil, and scraped them about a bit. After another 15 minutes they were much more appetising; but not as appetising as they would have been had I simply roasted them in my normal way (after taking the meat out of the oven). Better still, I might have made mash.
Shoulder of lamb responds very well to slow-roasting. Like belly pork, it is a forgiving cut, with plenty of lubricating fat: long cooking at a low heat makes it succulent and tender. Yesterday, I cooked a shoulder for eight hours in a roasting tin on the floor of an oven at its lowest setting. The meat was basted with the following marinade, which I had read about recently -- I cannot remember where.
2 cloves garlic
8 anchovies
1 sprig rosemary
1 dried chilli
1 tbsp white wine vinegar
3 tbsp olive oil
Salt and pepper
Chop the garlic, and crush it in a mortar with a little salt. (Or crush it on a board with the flat of a knife blade, and scrape it into a bowl.) Crush the anchovies with the garlic. Whizz the leaves of rosemary and the chilli in a herb mill. (Chopping them by hand is very tedious.) Add them to the garlic and anchovies. Blend in the vinegar, then the oil. Season with a little salt (the anchovies are salty) and a lot of pepper.
At the end of the eight hours, I lifted the lamb from the roasting tin and put in on a warm dish; I let it rest for half an hour on the grill shelf above the warm oven. I put the tin on a medium heat on the hob, and poured in a small glassful of white wine, scraping the tin and allowing the wine time to reduce. I poured this sauce into a small saucepan.
As the sauce cooled, a good deal of fat surfaced. I scraped off most of it. The volume of sauce was not generous; fortunately, I had some left over from a roast chicken, so I poured that in. I let this curious mixture bubble on the hob for a few minutes, before serving it with the lamb.
The anchovies did not taste fishy, but gave the dish a rich savouriness. The chilli was unobtrusive.
I try to test the commonly repeated advice that cookery writers give. But the assertion that the seeds are the hottest components of chillis is one that I have repeated unquestioningly, never suspecting that I should doubt it until I read The Book of General Ignorance. The hottest part of a chilli, the book says, is not the seeds: it is the white membrane to which the seeds are attached.
I did test this assertion. I deseeded a pimento -- a conical chilli. I put a few seeds into my mouth: a mild tingle. I tasted the membrane: blimey. It's a good thing that I didn't try this out on a Scotch bonnet.
The heat of chillis is unpredictable. The last pimentos I bought had a pleasant kick. Without its seed and membrane, this one had no heat at all.
I chopped a couple of pimentos and stirred them -- along with some crushed garlic, pepper and a little salt -- into a pot of Greek yoghurt. We ate this mixture with the grilled aubergines.
Heston Blumenthal said at the start of his new television programme that he would present us with techniques that we could use at home. A sausage stuffer? Liquid nitrogen? Dry ice and protective clothing? They won't be featuring in my home any time soon.
However, one idea of his did interest me. He advised a poaching of sausages for 30 minutes (the Sunday Times version gave the timing as 20 minutes) in 65C water, before frying on a medium heat. The gentle poaching helped to retain the juices of the meat, he said. A high heat for frying would cause the sausages to split; a low heat would cause the outsides to overcook.
I am not sure that I follow the logic of that last bit, but I do understand the need to cook sausages gently. I usually fry them on a very low heat, sometimes with a heat disperser beneath a heavy frying pan. The only other recipe I know that advises pre-poaching is Valentina Harris's sausages and beans in Italian Regional Cookery (BBC, now out of print). I thought I would give Heston's technique a try.
I had to guess the water temperature. I heated a saucepan of water until bubbles started to appear, put a heat disperser underneath it, turned down the flame to minimum, and dropped in the sausages. The water steamed, but did not bubble again. After 30 minutes (20 would probably have been enough), I took out the sausages, and let them dry on kitchen paper.
I heated a heavy frying pan on a medium flame, poured in a little groundnut oil (the oil that Heston recommended), and fried the sausages.
Sausages split much more easily than cookery writers allow, in my experience. At the weekend, Hugh Fearnley-Whittingstall offered a recipe for toad-in-the-hole, recommending that you heat oil or fat in a roasting tin in a gas mark 7/220C oven for 10 minutes, then throw in the sausages. If my butcher's sausages were to get that treatment, they would burst like an overstuffed corset. Even a medium heat puts them under pressure.
Small fissures, through which liquid spurted, appeared in my frying sausages. What I should have done was start them on a medium heat, turn them over after a minute, then gradually lower the flame as they continued frying.
Heston is on to something. In spite of the escape of juices, these sausages were plump and moist, and retained their chunky texture. I sometimes find that the meat in slow-fried sausages is, though juicy, rather compacted.
I should have slow-fried one of yesterday's sausages in order to compare the results. My failure to do so means that I am reluctant to assert that Heston's method is the best I have found. But I shall definitely use it again.
I have argued that salting aubergines to extract juices before cooking is unnecessary. To summarise: modern strains of aubergine are not bitter; even if they were, salting would disguise rather than remove the bitterness -- adding salt just before the aubergine went into the pan would have the same effect; pre-salting does not influence how aubergines cook if you slice them, brush them with oil, season them, and bake them.
What if you grill aubergines, though? Sometimes, in a salad, a grilled aubergine is just what you want. If you salt the slices so that they go floppy, do they cook more easily?
The first important point about grilling aubergines is that they need a coating of oil. If you grill them dry, with the intention of dressing them later, they never soften. I pour some olive oil into a saucer, slice the aubergines into rounds about 3 mm thick, and brush the oil over both sides of the rounds with the tines of a fork. I put them on to a ridged grill pan, with the heat underneath set on the low side of low to medium. I season them.
They take 10 to 15 minutes to soften. If they brown too quickly, I adjust the heat.
Last night, I set aside half a dozen rounds of aubergine, and salted them. When the rest of the aubergine was cooked, I patted these rounds dry of the moisture they had sweated out, and put them on to the pan. They cooked no faster and no slower than the ones that had not been pre-salted.
I do not yet see a case for retitling my book.
 She arranges the recipes thematically: you get dozens of pear and apple dishes in the autumn chapter, for example. There is nothing fancy about the descriptions, and there are no pictures; but the abundance of appealing ideas makes you want to get into the kitchen right away.


